Thursday 12 November 2015

FINAL SUBMISSION

FINALIZED 3D ANIMATION

Sound ended up quite basic, but I feel like it got the motives across.  Embry ended up looking more thoughtful than actually upset but who’s to say his small mind isn’t already working out how to get Vasili out of that big crystal?
sound effects taken from http://freesound.org

Wednesday 11 November 2015

Assessment 3 Rationale

There were a variety of creative decisions influencing my project, but perhaps the central and most important of these was the idea to portray two characters of indeterminate gender sharing an important connection - and in that regard I think that I have achieved it pretty well as the golem Embry and druid Vasili could be interpreted as either male or female in their fantasy based designs and skirt/wrap-like outfits.  Pre-production and designing a character/background came pretty naturally to me after all the work of our first semester, and when we began to work with the Maya program, I found myself remembering things from the time that I had studied it 3 years ago at AUT.  

It took a little to get used to using the program again, but the way that we learned to model the characters was much different to the extrude and adjust method that I had learned before.  I got to use both methods in the process of creating my prop and character, and I found this phase particularly enjoyable.  I would definitely like to continue to model the geo for characters, though looking back I deleted a lot of edges in my mesh that caused problems for me later on.  I know better than to do that now, thankfully.  That said there were issues that I had with my mesh, particularly his face and the indents surrounding his nose.  For a while he looked very alien despite how closely I had modelled him to my drawing, and it took quite a bit of trial and error moving vertices around to fix him.  I accidentally cleaned my history after converting my model to high poly, which was a point of frustration when trying to modify his face for blend shapes, but at the same time I’m grateful for it, since it gave him a much smoother range of motion.  There is something very soothing about modelling characters though and I would like to do more of it.  I’ve considered that it might be a field I could go into if I choose to pursue 3D further.  

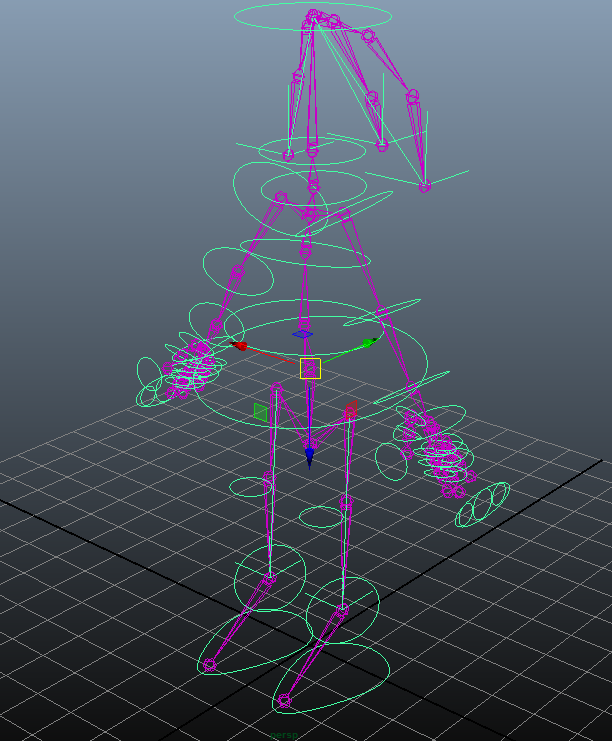
Rigging was quite a bit harder and every bit as awful as the second year 3D students told us it would be.  I had absolutely no experience in this area at all and I know I struggled a little bit and assumed things wouldn’t take me as long as they actually did.  Even now I’m still not 100% sure my model has all its skin weights in the right places, and evidence of my attempts to fix things (and actually make them worse) can be seen in the final animation.  Skin weight painting in particular was what I found most tedious and perhaps is my least favorite part of character modelling this entire semester.

In terms of scene setting, I feel like I cheated too much with the background.  Initially I’d planned to put a skydome of ice over the character and prop, but it made the scene seem too empty and less like the palace look I was going for.  I’ve never had much initiative with lighting either, and if it weren’t for Keat’s guidance, I know my scene would not look as lovely as it does now.  Camera shots are the worst part of setting up a scene for me, as I do not feel like I have a talent for framing and angles, and I’m just grateful i didn’t have many moving camera shots, because I really hate setting those up.

Animating the character was quite an exciting part though!  It was such a wonderful feeling, seeing something that you created moving about before your eyes and knowing that it was something you made from scratch.  I already had ideas for how i wanted Embry to move around, as a clay golem I wanted him to be heavy and his movements to be slow and reverent - childlike the way the original film clip for this assignment was.  There were ideas to contrast his warm coloration with the cold colors of the icy environment, which i think has come through quite well.  In terms of actual animation, I’ve done little bits in Maya before, but they have never looked fluid and realistic and just came off as bad and clunky.  Under Keat’s guidance, I’ve come to love the movements and actions that my character has gone through, and its always amazing to realize how such tiny details like a slight twist of the spine or bend in the knees really affects how realistic the overall animation becomes.  At times animation can become very tedious and exhausting and I found myself only able to do a set amount per day, which I know is not good practice and I won’t have such a luxury once I’m working in industry.

Overall though, I have really enjoyed 3D, perhaps even more than 2D and I can definitely see it as a field I could go into and enjoy.  I still have a lot to learn, but hopefully with practice those smaller movements and camera angles can come more easily to me and I can create truly engaging stories for others to enjoy.

Playblast!

Final animation playblast while rendering happens!

12/11/15 - Finalization

There hasn't really been much to update lately.  I've been working hard on my scene and tweaking my animation to the best that I can possibly make it and that has taken a good few weeks by the feel of things.  Lighting has been tested out and added to the scene as well and some aspects of the background were edited and textures were shifted around.

Here's a storyboard-ish scene by scene test of my animation:


I'm going to start work on compositing as soon as everything has finished rendering.

Wednesday 4 November 2015

Small update~!

Not much new to talk about currently.  The week has more or less been spent trying to finish my scenes and get them to perform realistically.

Here is an updated playblast:

Sunday 1 November 2015

02/11/15 - Walkcycle and animation

Spent the rest of the week working on animating my character!  In the process of it, I discovered that my camera shots were nowhere near long enough to work with the mood and atmosphere that I wanted to portray in my scene.  Because of this, I've sortof skipped the keyframing part of the assignment and attempted to go straight into a fully rendered animation.  I feel like knowing exactly what my character is going to do is going to help me figure out how long each shot should be.

Here's the walk cycle I was working on over the weekend:

Today however, I have learned about the value of playblasting and how it can help me with the timing in my shots.  Currently everything is playing slower than i expected it to, and I only discovered it through the following playblast:


Plans for today are to work on refining my animation, and get the scenes to the length of time where I want them

Monday 26 October 2015

27/10/15 - Scene Staging

After a rather relaxing long weekend, I have returned to class to work on finally animating my scene!  The first step required of us was to set up our camera shots, so I spent most of today working on that and familiarizing myself with the 'step' feature in the graph editor.  Its a lot more handy than I thought it would be, and i find myself really wishing that someone would have taught me about it at my last course.  It would have saved me a lot of unnecessary keyframing.

I also took the opportunity to take a lot of screenshots detailing my scenery, camera angles and lighting:


And after looking back on my storyboards, I managed to come up with this playblast!


Wednesday 21 October 2015

22/10/15 - Pre-animation setup!

Now that I've sorted out my rig, I've had to return to my prop and clean it up a bit in order to set up a scene for animating.  That has basically been what I have focused on today; just setting up a skydome and texturizing everything to make it fit for animating.

Here are a few screenshots:


I might still change it from its current skydome sphere to more of a cube shape though, in order to reflect the sense that the characters are within a building rather than out in the open somewhere

Sunday 18 October 2015

19/10/15 - RIGGING SUBMISSION

SUBMISSION FOR ASSIGNMENT 3 - PART 1


As always, if the video doesn't work, it can be found on my tumblr!

Rendering.....


Please standby for Assignment hand-in.......

19/10/15 - Keying and Skinweights

Been trying to finish up the last of my model for Monday submission, but over the weekend I came to realize that painting skinweights and making the rig do what i want it to is a lot harder than one would first believe.

I gave myself two days to complete at least the keying and skinning, intending to do the camera today, but much to my dismay, keying the model took an entire day, and though i spent all of yesterday doing skinweights, I wasn't able to complete everything I wanted, and both my knees and elbows were looking pretty bad.  I intended to have the character bend down to touch his toes, but had to change it last minute as bending was more or less impossible without completely deforming the geometry.  Even getting him to raise his arms up to the sides of his head was difficult - the character's forearms kept warping and deforming.

So today has been spent trying to fix the problems I have had - repainting my elbows and my back, fixing my knees and re-keying the frames so that my poses were better suited for the current weights painted on my rig.  The movements in it are very simple - lifting and lowering the feet to display IK, rolling the shoulders, bending the arms, flexing the fingers and giving a big thumbs up along with playing over my four expressions.  I'm still having issues with my elbows that I'm hoping to tackle after the lunch period is over.


As you can see, my right elbow is more or less successful, but getting the left to match it has been incredibly hard.  I can't use the mirror skinweights tool, as it seems every time I use it it seems to destroy another part of my mesh.

Over the course of the last two days, I've been using a lot of Hammer Weights, and its been a wonderful tool for fixing giant spikes or large bumps that appear in my mesh.  I feel like I wouldn't be as far as I am now without it.

Over the weekend I also changed my FK arm controls to IK ones and today I was told I'd done it wrong and that my rig would be more effective with FK.  I've put the FK back on my arms, but now I need to redo all the keys and skinweights that I had on them and that is somewhat stressful.

Going to try and finish this up and hopefully put a video up soon.

Monday 12 October 2015

13/10/15 - Blendshapes preparation

There are a lot of things I need to adjust shapes for in my animation sequence, so I'm just going to list them here to get my thoughts in order.

In the process of the animation, Embry makes a few expression changes.  Most notably:

- Surprise/Awe
- Sadness
- That squinty look you get when you're about to cry.

Bits of him that need to move are:

- His eyes:  moving to either side and up/down
- Both eyebrows - going up in surprise/angled and to the sides for sorrow
- His mouth - making O shapes and D: shapes
- Eyelids: opening and closing and widening.

Therefore the parts of him that are going to be affected are:


  • Default dummy:
    - left eyebrow - neutral (default)
    - right eyebrow - neutral (default)
    - left eye - centered (default)
    - right eye - centered (default)
    - body mesh - eye sockets normal (default)
    - body mesh - upper eyelid open (default)
    - body mesh - lower eyelid open (default)
    - body mesh - mouth neutral (default)
    - body mesh - mouth closed (default)
  • Dummy 1
    - left eyebrow - lifting
    - right eyebrow - lifting
    - left eye - looking left
    - right eye - looking left
    - body mesh - mouth turned down
    - body mesh - eye socket wide
  • Dummy 2
    - left eyebrow - lowering
    - right eyebrow - lowering
    - left eye - looking right
    - right eye - looking right
    - body mesh - mouth open
  • Dummy 3
    - left eyebrow - rotating left in a / shape
    - right eyebrow - rotating left in a / shape
    - left eye - looking up
    - right eye - looking up
    - body mesh - upper eyelid closed
  • Dummy 4
    - left eyebrow - rotating right in a \ shape
    - right eyebrow - rotating right in a \ shape
    - left eye - looking down
    - right eye - looking down
    - body mesh - lower eyelid lifted

I may remove the blink if things cut a little too close to submission date - seeing as Embry is a golem he technically doesn't need to blink at all.  But I think it would add a little more realism to him if it was kept in.

Here are some WIPs from over the day:


Sunday 11 October 2015

12/10/15 - Rigging complete!

The past week has been dedicating to finishing my rigging and today I was finally successful!  The process of constraining and orienting things was really easy after having to do it for every single joint, just time consuming.  What really frustrated me the most over this whole thing was rigging up my hand over the weekend and then forgetting to bring it to school on my flash drive today.  On the bright side, I got both hands and my hair rigged up a lot more neatly wit less time spent trying to figure things out.

Here is the rig in its entirety:


Most of it is joined with the basic orient constraints that we learned about the other week,


Character's legs and hair both have IK controls on them which will make it easier to animate the character walking and give him flexible hair movement.


His hands are perhaps the most complex part of the rig and took the longest time to set up - After orienting each joint in the fingers, I used two driven keys to adjust the curl for each finger, as well as a control for curling all of the fingers at the same time.

As evident in the last image though, I really need to start painting my skin weights and working on my blend shapes and will probably spend this week doing both of those.  But in the meantime, my outliner is feeling very organized.


Monday 5 October 2015

06/10/15 - Progress report

I've come to realize that Rigging deals with a lot of time consuming technical work - The past two weeks have been spent building up a skeleton for my model and proceeding to paint it and add controls to it.

Making an accurate skeleton only took a couple of days, but most of the last two weeks were spent working on an assignment for another class, so I neglected my 3D quite a bit and did not progress as quickly as i would have liked.  Regardless, my skeleton seems to work quite well, though figuring out the different ways to create rigid and more fluid/natural joints took a little bit of time.

First attempt at a skeleton actually yielded some flaws - The upper legs in this image are much too short and the character's core is not centered in the body.  Tutor was very helpful in helping me correct these flaws though!


I spent most of last week trying to paint my skin weights before rumors went around that we needed to have added controls in before binding the skin and painting.  I didn't get very far with it, but I was using a mouse and one of the students from the 3D class told me that it would be much easier to do with a tablet and pen.  Once I'm done with controls, I intend to properly paint my skinweights onto my character using my desktop at home.

Here is some of the progress I made with my skin weights though

Before Fixing

After Fixing

As of yesterday I've been setting up controls for my rig.  It is set up for FK controls at the moment, but I will be adding IK controls to the legs over the afternoon session.


Still need to work on hands and add constraints to the fingers, but I'll be working on those later on too.

Monday 21 September 2015

21/09/15 - Term 4 and rigging planning

Start of a new term means further work on our character models!  Today we just had to plan out how we wanted the skeleton of our character to look, which resulted in these two plan diagrams:


They are very simplistic, but give me an idea of which parts of my character I'm going to need to move.  The hand may need more joints in it, but I'm supposing I will have time to refine my model further and this is only a basic plan.

Honestly i'm a little apprehensive about rigging, as I've heard its the hardest and most frustrating part of the 3D process.  I'm really hoping this term will prove otherwise.

Monday 31 August 2015

01/09/15 - Completed Character Turnaround for Submission

TURNAROUND:


Again, if for some reason the video doesn't work, the video can be found on my tumblr.


31/08/15 - UVing the character.

Spent the entire day today learning how to take my character apart and UV all his appropriate parts with the appropriate textures.  Still really grateful for the script, which cut down on a lot of time I would have spent organizing and stitching things together.  Because of it, I managed to get my UVs done for the character's body and had him more or less complete by the end of the day!

Coloring the parts was perhaps the most time consuming and frustrating part of this exercise.  I spent a lot of time jumping in between Maya and Photoshop, painstakingly altering and updating the image files so that things would line up correctly on my character model.  This was particularly difficult with the marks on his shoulder, his belt, and the hollow heart shape in the middle of his chest.  Once smoothed, the edges of things shifted, so I found myself having to do a small line of color in certain places so that the edges would still look accurate even in a smoother mode.

I ended up reverting to cutting the character in half so that I could simply mirror his texture once the model was complete.


I experimented with a few things as well, such as how to divide the character's hair and whether I wanted variation in his locs.  Here are a couple of maps with tests on them - both of them are for one of the dreadlocks on his head:


I opted out of this idea in the end though, sticking to a single solid color under the texture instead, as messing with it made his hair much darker than I wanted it to be.

I've never worked on something for what was more or less a solid 6 hours though!  It made me realize the importance of taking breaks and actually finding the time to have lunch.  Nonetheless, my character model is complete!


I had a little bit of time to work on refining his textures, as quite a few of them had large seams from me sticking strictly to the UV guidelines.  Adding little bits to the borders fixed this up though, and as a result I think my final character looks very solid.  His face still creeps me out a little but overall I think it was very successful for my first character model!

Keat suggested I tweak his eyes a little bit though as my textures didn't look as good as they could have.  Here's some screenshots of me trying to adjust them:


I plan to finish him up and get a turntable done tomorrow!  So stay tuned for the final turnaround file.

27/08/15 - UV progress!

Keat has given me permission to use my script, though class time has more or less assured that I actually understand what UVing is and how to go about it.  Its good because I can use that knowledge to edit the unwrapped maps that my script provides and create a mesh much closer to what I want.

Today I've been working on unwrapping and texturing all the smaller parts of my character that aren't his main body.  I've managed to complete the hair, eyes, tongue, bandanna and bracelets!  Here are some progress shots of them, without the body in the way


I've used both textures I found on google and textures from Mayang to create these so far.  These took me a good few days to complete and I'm surprised at how much work goes into UVing even with a script.

Here are the textures I've used so far:


Monday 24 August 2015

25/08/15 - Progress

Two hours of tutorials later and I've managed to make a very quick test UV for one of my character's eyeballs:


Still using the script, but things aren't functioning as they should.  I might see if there is an updated version as the one I have is from 2010.