Monday 26 October 2015

27/10/15 - Scene Staging

After a rather relaxing long weekend, I have returned to class to work on finally animating my scene!  The first step required of us was to set up our camera shots, so I spent most of today working on that and familiarizing myself with the 'step' feature in the graph editor.  Its a lot more handy than I thought it would be, and i find myself really wishing that someone would have taught me about it at my last course.  It would have saved me a lot of unnecessary keyframing.

I also took the opportunity to take a lot of screenshots detailing my scenery, camera angles and lighting:


And after looking back on my storyboards, I managed to come up with this playblast!


Wednesday 21 October 2015

22/10/15 - Pre-animation setup!

Now that I've sorted out my rig, I've had to return to my prop and clean it up a bit in order to set up a scene for animating.  That has basically been what I have focused on today; just setting up a skydome and texturizing everything to make it fit for animating.

Here are a few screenshots:


I might still change it from its current skydome sphere to more of a cube shape though, in order to reflect the sense that the characters are within a building rather than out in the open somewhere

Sunday 18 October 2015

19/10/15 - RIGGING SUBMISSION

SUBMISSION FOR ASSIGNMENT 3 - PART 1


As always, if the video doesn't work, it can be found on my tumblr!

Rendering.....


Please standby for Assignment hand-in.......

19/10/15 - Keying and Skinweights

Been trying to finish up the last of my model for Monday submission, but over the weekend I came to realize that painting skinweights and making the rig do what i want it to is a lot harder than one would first believe.

I gave myself two days to complete at least the keying and skinning, intending to do the camera today, but much to my dismay, keying the model took an entire day, and though i spent all of yesterday doing skinweights, I wasn't able to complete everything I wanted, and both my knees and elbows were looking pretty bad.  I intended to have the character bend down to touch his toes, but had to change it last minute as bending was more or less impossible without completely deforming the geometry.  Even getting him to raise his arms up to the sides of his head was difficult - the character's forearms kept warping and deforming.

So today has been spent trying to fix the problems I have had - repainting my elbows and my back, fixing my knees and re-keying the frames so that my poses were better suited for the current weights painted on my rig.  The movements in it are very simple - lifting and lowering the feet to display IK, rolling the shoulders, bending the arms, flexing the fingers and giving a big thumbs up along with playing over my four expressions.  I'm still having issues with my elbows that I'm hoping to tackle after the lunch period is over.


As you can see, my right elbow is more or less successful, but getting the left to match it has been incredibly hard.  I can't use the mirror skinweights tool, as it seems every time I use it it seems to destroy another part of my mesh.

Over the course of the last two days, I've been using a lot of Hammer Weights, and its been a wonderful tool for fixing giant spikes or large bumps that appear in my mesh.  I feel like I wouldn't be as far as I am now without it.

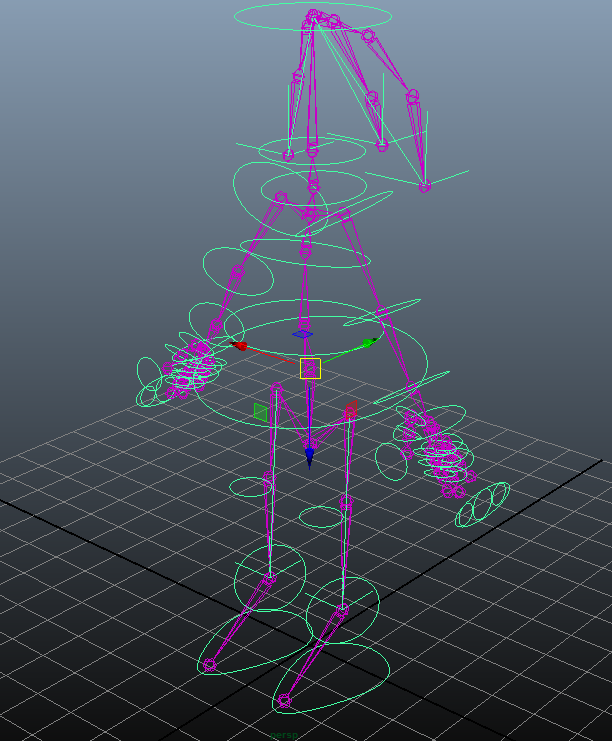
Over the weekend I also changed my FK arm controls to IK ones and today I was told I'd done it wrong and that my rig would be more effective with FK.  I've put the FK back on my arms, but now I need to redo all the keys and skinweights that I had on them and that is somewhat stressful.

Going to try and finish this up and hopefully put a video up soon.

Monday 12 October 2015

13/10/15 - Blendshapes preparation

There are a lot of things I need to adjust shapes for in my animation sequence, so I'm just going to list them here to get my thoughts in order.

In the process of the animation, Embry makes a few expression changes.  Most notably:

- Surprise/Awe
- Sadness
- That squinty look you get when you're about to cry.

Bits of him that need to move are:

- His eyes:  moving to either side and up/down
- Both eyebrows - going up in surprise/angled and to the sides for sorrow
- His mouth - making O shapes and D: shapes
- Eyelids: opening and closing and widening.

Therefore the parts of him that are going to be affected are:


  • Default dummy:
    - left eyebrow - neutral (default)
    - right eyebrow - neutral (default)
    - left eye - centered (default)
    - right eye - centered (default)
    - body mesh - eye sockets normal (default)
    - body mesh - upper eyelid open (default)
    - body mesh - lower eyelid open (default)
    - body mesh - mouth neutral (default)
    - body mesh - mouth closed (default)
  • Dummy 1
    - left eyebrow - lifting
    - right eyebrow - lifting
    - left eye - looking left
    - right eye - looking left
    - body mesh - mouth turned down
    - body mesh - eye socket wide
  • Dummy 2
    - left eyebrow - lowering
    - right eyebrow - lowering
    - left eye - looking right
    - right eye - looking right
    - body mesh - mouth open
  • Dummy 3
    - left eyebrow - rotating left in a / shape
    - right eyebrow - rotating left in a / shape
    - left eye - looking up
    - right eye - looking up
    - body mesh - upper eyelid closed
  • Dummy 4
    - left eyebrow - rotating right in a \ shape
    - right eyebrow - rotating right in a \ shape
    - left eye - looking down
    - right eye - looking down
    - body mesh - lower eyelid lifted

I may remove the blink if things cut a little too close to submission date - seeing as Embry is a golem he technically doesn't need to blink at all.  But I think it would add a little more realism to him if it was kept in.

Here are some WIPs from over the day:


Sunday 11 October 2015

12/10/15 - Rigging complete!

The past week has been dedicating to finishing my rigging and today I was finally successful!  The process of constraining and orienting things was really easy after having to do it for every single joint, just time consuming.  What really frustrated me the most over this whole thing was rigging up my hand over the weekend and then forgetting to bring it to school on my flash drive today.  On the bright side, I got both hands and my hair rigged up a lot more neatly wit less time spent trying to figure things out.

Here is the rig in its entirety:


Most of it is joined with the basic orient constraints that we learned about the other week,


Character's legs and hair both have IK controls on them which will make it easier to animate the character walking and give him flexible hair movement.


His hands are perhaps the most complex part of the rig and took the longest time to set up - After orienting each joint in the fingers, I used two driven keys to adjust the curl for each finger, as well as a control for curling all of the fingers at the same time.

As evident in the last image though, I really need to start painting my skin weights and working on my blend shapes and will probably spend this week doing both of those.  But in the meantime, my outliner is feeling very organized.


Monday 5 October 2015

06/10/15 - Progress report

I've come to realize that Rigging deals with a lot of time consuming technical work - The past two weeks have been spent building up a skeleton for my model and proceeding to paint it and add controls to it.

Making an accurate skeleton only took a couple of days, but most of the last two weeks were spent working on an assignment for another class, so I neglected my 3D quite a bit and did not progress as quickly as i would have liked.  Regardless, my skeleton seems to work quite well, though figuring out the different ways to create rigid and more fluid/natural joints took a little bit of time.

First attempt at a skeleton actually yielded some flaws - The upper legs in this image are much too short and the character's core is not centered in the body.  Tutor was very helpful in helping me correct these flaws though!


I spent most of last week trying to paint my skin weights before rumors went around that we needed to have added controls in before binding the skin and painting.  I didn't get very far with it, but I was using a mouse and one of the students from the 3D class told me that it would be much easier to do with a tablet and pen.  Once I'm done with controls, I intend to properly paint my skinweights onto my character using my desktop at home.

Here is some of the progress I made with my skin weights though

Before Fixing

After Fixing

As of yesterday I've been setting up controls for my rig.  It is set up for FK controls at the moment, but I will be adding IK controls to the legs over the afternoon session.


Still need to work on hands and add constraints to the fingers, but I'll be working on those later on too.