Patrick finished the game last night and we all got to look at it this morning! I'm so happy we managed to get it done on time, and for a first attempt at Unity, everything's looking great!
Here are some screenshots from the game
And the downloadable file can be found here!
Wednesday, 23 November 2016
INTERACTIVE :: 23/11/16 - Final Touches
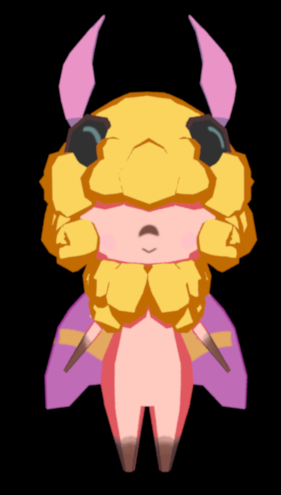
Spent today preparing the moth assets for integration into Unity! I decided to make both a pants/no pants version of the character, since putting pants on the moth was a happy accident in the first place. I really wish I'd had more time to make variations on the character, though unfinished UVs for a Royal Walnut moth variation exist - He's missing the correct markings on his wings.
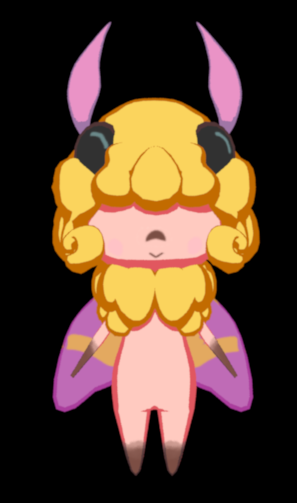
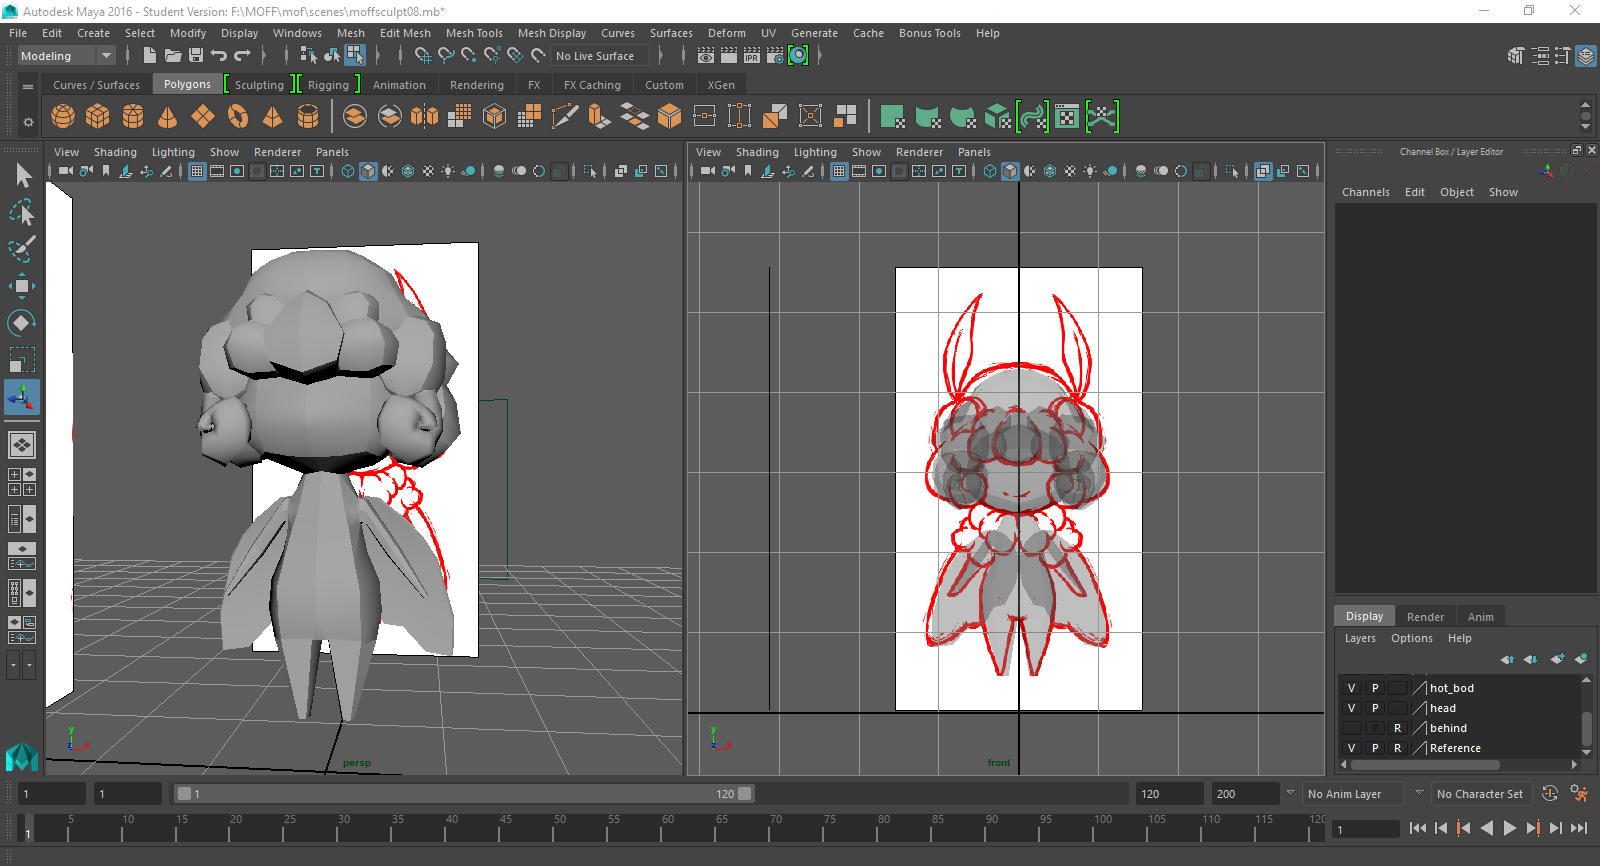
While I was at it, I also did a proper 2D turnaround sheet for my current moth, and colored in the reference images I used while sculpting it. Looking at them, the character has remained overall the same through the concept and finalization stages.
While I was at it, I also did a proper 2D turnaround sheet for my current moth, and colored in the reference images I used while sculpting it. Looking at them, the character has remained overall the same through the concept and finalization stages.
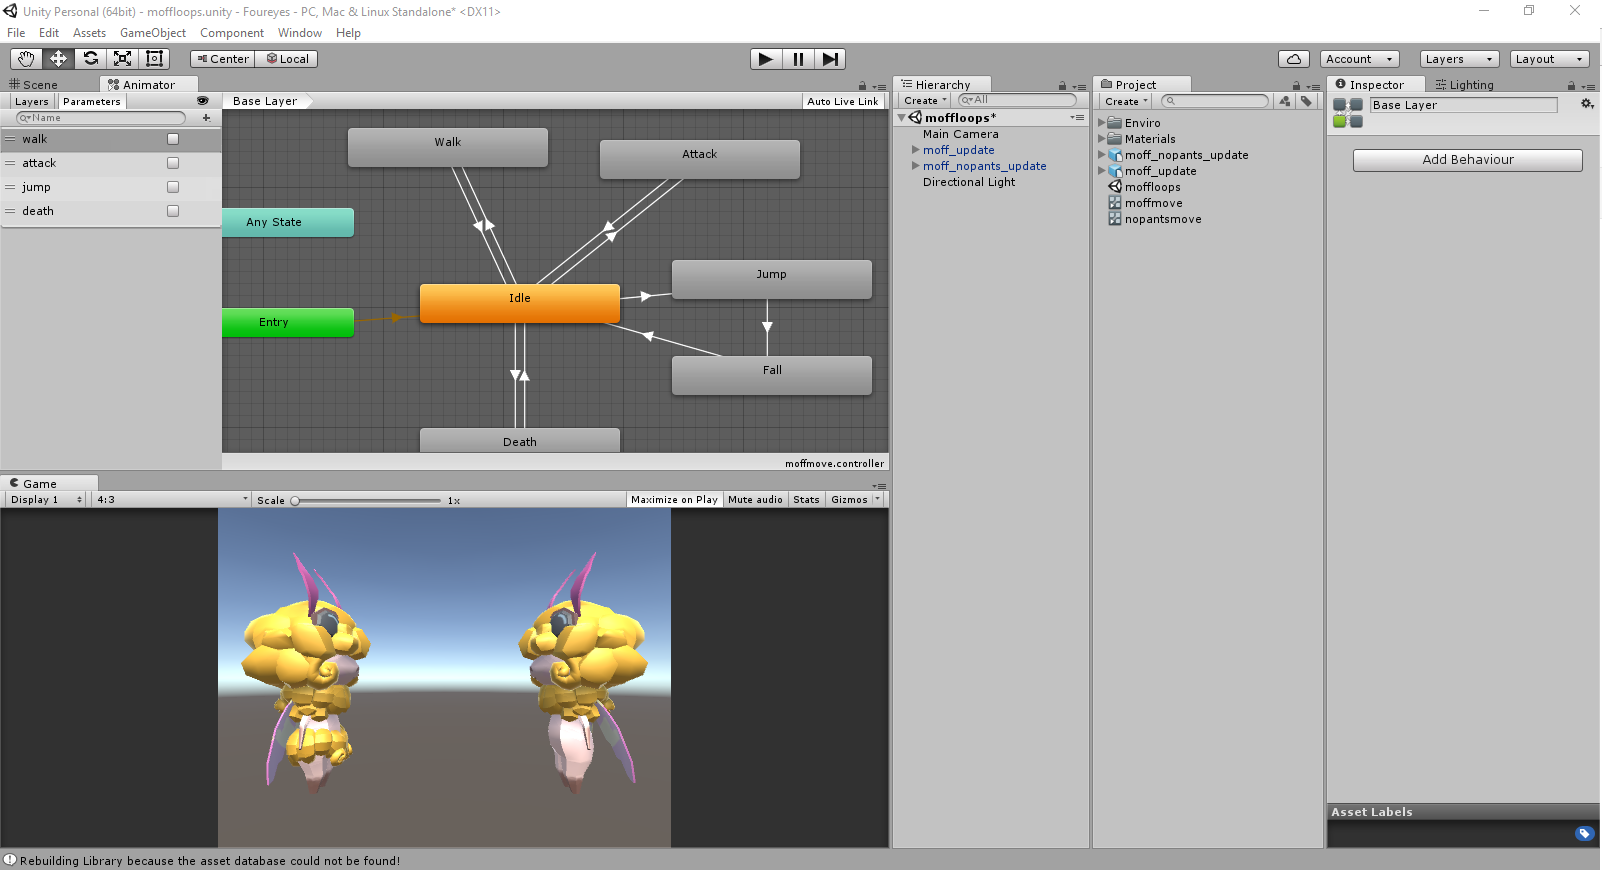
The Unity setup was easy to manage once I got a few pointers on how to go about making transitional loops. I also refreshed my knowledge of booleans.
A few of the animations had to be edited though, due to the loops not being completely smooth. The walk cycle has had a frame shaved off the beginning and end of it, and the jump animation was split into a jump and fall cycle. It went pretty smoothly and I'm really happy with how the end result turned out!
Here's a playtest the animation states:
The last thing I did for the project was worked on a quick introduction sequence to familiarize the player with the backstory of the game. I went for a sort of scroll-esque, history book feel, similar to things like the ending sequences of the early Fire Emblem games and the introduction to Zelda: The Wind Waker, so I have gone with a sketchy sort of line style and sepia toned images.
It has since been compiled into an intro video and will play at the beginning of starting a new game.
With that, I've more or less finished everything required of me for this project, which I'm actually quite surprised about. I did not expect the process to go as smoothly as it has, and while I feel as though I fell behind schedule for a good amount of the process, I've made it to this point and feel very calm and prepared for the whole thing. The project itself has been a very good learning experience, though admittedly my involvement with the Unity aspect of it feels minimal, but I have been able to draw on experiences and practices that I learned last year, and discovered that I could create a model a lot more quickly than I have before.
There were very few, if any snags in the process, and things largely fell behind due to my own time management than any issues with the programs, concept, or group. I messed up in a few places when I was rigging the character - the arms don't bend at the right angles, and I had issues with his knees due to not creating the slight bend in the bones where the knee joint should have been. These were all adjusted and overcome relatively easy though, and I had no issues with the animation process at all. I'm still not 100% with creating what I believe to be fluid and realistic animations, but for my second time animating a character, I feel as though I did pretty well.
In terms of development, I feel as though the character concept was pretty solid throughout the entire process - the team did not have anything negative to say about my moth, and he did not need much in terms of refinement, beyond a slight change in body shape. I do regret that I wasn't able to make extra color variants of the character, as I would have liked to have seen a whole spectrum of moths, but I may do these in my own time. The creation of the moth's pants was a happy accident, and I feel has been the only major change in the design process.
The team has been wonderful too! We all worked extremely well with one another, each of us assigned to an area that has been completed within the timeframe. I feel as though we're all ready for presentations tomorrow, and am confident that our game will look really good once all the coding has been sorted.
Monday, 21 November 2016
INTERACTIVE :: 22/11/16 - Completed Animations
Finished up the final two animations that I needed today! Here are the playblasts for them:
Death Animation:
Walk Cycle (single loop):
In terms of frame counts, the final Maya file contains all of the following:
Death Animation:
Walk Cycle (single loop):
In terms of frame counts, the final Maya file contains all of the following:
- Attack Animation - 20 frames: 01 - 20
- Idle Animation - 40 frames: 24 - 64
- Jump Animation - 38 frames: 68 - 106
- Death Animation - 28 frames: 110 - 138
- Walk Animation - 16 frames: 142 - 158
I'm cleaning up the final animations in the graph editor to make sure they're optimized for the game now, and will post a rendered video of the moth's animations once it has finished rendering. Hopefully we'll be able to place the central character into the game tomorrow without any problems, which will then only leave me to make the opening sequence for the game.
Sunday, 20 November 2016
INTERACTIVE :: 21/11/16 - Character Animations
Over the past week I've been slowly working on the animations for the moth character, with varying degrees of success. Currently I'm looking up tutorials for how to do a convincing walk cycle and death animation, as these are the last two animations I need to create to place in the game. At this point we're going with a one-hit kill format similar to classic games like the original Super Mario in order to save time. Hopefully it will only take me today and tomorrow to get these animations done, and spend the rest of the week writing up the flavor text and drawing introduction images for the beginning of the game while Patrick puts everything into Unity.
Here are the other animations I've made for the project so far, in playblast form:
Attack:
Idle:
Jump:
Here are the other animations I've made for the project so far, in playblast form:
Attack:
Idle:
Jump:
Tuesday, 15 November 2016
INTERACTIVE :: 16/11/16 - Controls
Took me longer than i wanted to get to this point, but controls have been added and completed for the moth rig
Saturday, 12 November 2016
INTERACTIVE :: 13/11/16 - Moth Rigging
Most of the week has been spent rigging and painting my moth's skin weights to make sure that it moves and flexes correctly. With the model as simple as it is, figuring out the skin weights has not been too difficult.
Skin weights have been mirrored so that both sides are even.
Over the weekend, I made a quick animation to showcase what the rig can do! Due to its tiny limbs, however, it is somewhat difficult to show the moth doing things that require extensive stretching of its arms and legs. it was only after I finished rigging that I also noticed I positioned the joints of its arms wrong, so making them rotate can be a bit of an issue at times.
At this stage, all I need to do is add controls and then I can begin animation! I may require a refresher course on how those work, but it shouldn't take too long.
Wednesday, 2 November 2016
INTERACTIVE :: 02/11/16 - Rigging Moth
The past couple of days I have spent trying to refamiliarize myself with the rigging aspect of 3D modelling. The moth feels like it will be a lot easier to rig than the model I created last year, as it has very simple arms/legs with no fingers. I honestly only wanted to spend a couple of days on getting the rig together, but unfortunately, personal issues have arisen and I'm a little behind on where I would like to be with it.
There aren't really too many progress shots to show so far - I've created all the joints and put them together in a hierarchy, ready to bind to the skin once I confirm with another group member that everything is connected the way that its supposed to be.
Also, while messing around yesterday, me and the rest of the team accidentally ended up creating a more appealing moth, as well as creating a basis for the 'sage' character by being silly and messing around with the character's fur parts.
The moth actually looks quite cute with fluffy pants, even if the 'pants' are just a rotated version of the fluffy collar around its neck.
As for the sage, we found that by increasing the size of the fur collar and shifting it up, we could create a pretty convincing beard.
This one was just for fun. It really looks like a sheep now.
There aren't really too many progress shots to show so far - I've created all the joints and put them together in a hierarchy, ready to bind to the skin once I confirm with another group member that everything is connected the way that its supposed to be.
The moth actually looks quite cute with fluffy pants, even if the 'pants' are just a rotated version of the fluffy collar around its neck.
As for the sage, we found that by increasing the size of the fur collar and shifting it up, we could create a pretty convincing beard.
This one was just for fun. It really looks like a sheep now.
Labels:
2016,
3D modelling,
BAR12,
Character Model,
game development,
Rigging,
term 4,
WIP
Thursday, 27 October 2016
INTERACTIVE :: 27/10/16 - Moth UV
Showed the moth to the group today and got some suggestions on how to improve it! Patrick suggested that I make sure that none of the geo was clipping into itself, so I've modified the little curls further in order to better reflect that. Now none of it is clipping into itself.
I've UV'd certain parts of the moth as well - the head, body, wings, and goggles. The hair and neck fluff I left alone since that is just needs to be one flat color, and while I assumed that I could just leave the antenna alone, but now that I look at them, I feel like I should probably add a feeler texture to them too. I'll be doing that later.
Right now we're trying to figure out what kind of colors we want for our moth protagonist, and going back to my concepts, it was suggested that I try either the Rosy Maple moth or Royal Walnut moth colors (first and last moths featured), due to the fact that they would have a good amount of contrast against the brown/grey palette of Patrick's level.
I still need to make the UVs for the Royal Walnut, but here's a turnaround of my rosy maple moth!
I also added toon shader textures to it, just for fun, as well as a smoothed the mesh out. Neither of these will be used for the project, which is kindof a shame since they look so nice!
Tuesday, 25 October 2016
INTERACTIVE :: 26/10/16 - Still sculpting
More progress has been made on the moth! Yesterday I finished his hair, complete with tiny spirals. I fell back onto using a NURBS curve + extrude method to make them.
I wish i'd added more edge loops to it though, because the shape ended up kinda awkward. It still looks good though, so I'm quite happy with it. The moth is starting to look like a little sheep.
But today, I have finished the basic model! Instead of struggling with modelling the neck from scratch, I cheated a bit and used a torus. The fluff on the arms are made of individual spheres. I also created a second set of spirals using the NURBS curves.
Now that that's been done, I've been doing some housekeeping and organized parts of the moth into layers and groups. All of the individual parts have been frozen and the pivot has been centred on each of them. I had a little trouble with objects that I mirrored refusing to freeze, but I got around it by combining and duplicating the meshes and deleting the halves that I didn't need.
I wish i'd added more edge loops to it though, because the shape ended up kinda awkward. It still looks good though, so I'm quite happy with it. The moth is starting to look like a little sheep.
But today, I have finished the basic model! Instead of struggling with modelling the neck from scratch, I cheated a bit and used a torus. The fluff on the arms are made of individual spheres. I also created a second set of spirals using the NURBS curves.
Wednesday, 19 October 2016
INTERACTIVE :: 20/10/16 - Moff progress
Been slowly working on the moth sculpt over the week! I'm utilizing as much of class time as possible to make progress on him, and its starting to look pretty good!
This is where I was at on the sculpt yesterday, the basic shapes of the body have been pretty easy to make. Initially I considered making the wings out of planes, but making a thin 3D shape seems to have worked out pretty well too. Its slim enough that it shouldn't be too hard to move when end up rigging.
Today however, i started sculpting the moth's hair, using one giant piece for the main hair body and smaller parts for the fringe parts. As much as I wanted to sculpt the entire thing from one piece, I had a hard enough time with the base part, so smaller, individual hair parts are probably the better idea here.
Its been pretty slow going, but I'm hoping to have that and the neck fluff done some time early next week so I can start rigging. I need to add more circular shapes to the sides of the head and make an indent for the moth's goggles. Not entirely sure how I'm going to go about making the little curls on either side of his face but I guess I'll figure that out when I get there.
Monday, 17 October 2016
INTERACTIVE :: 18/10/16 - Making Moffs
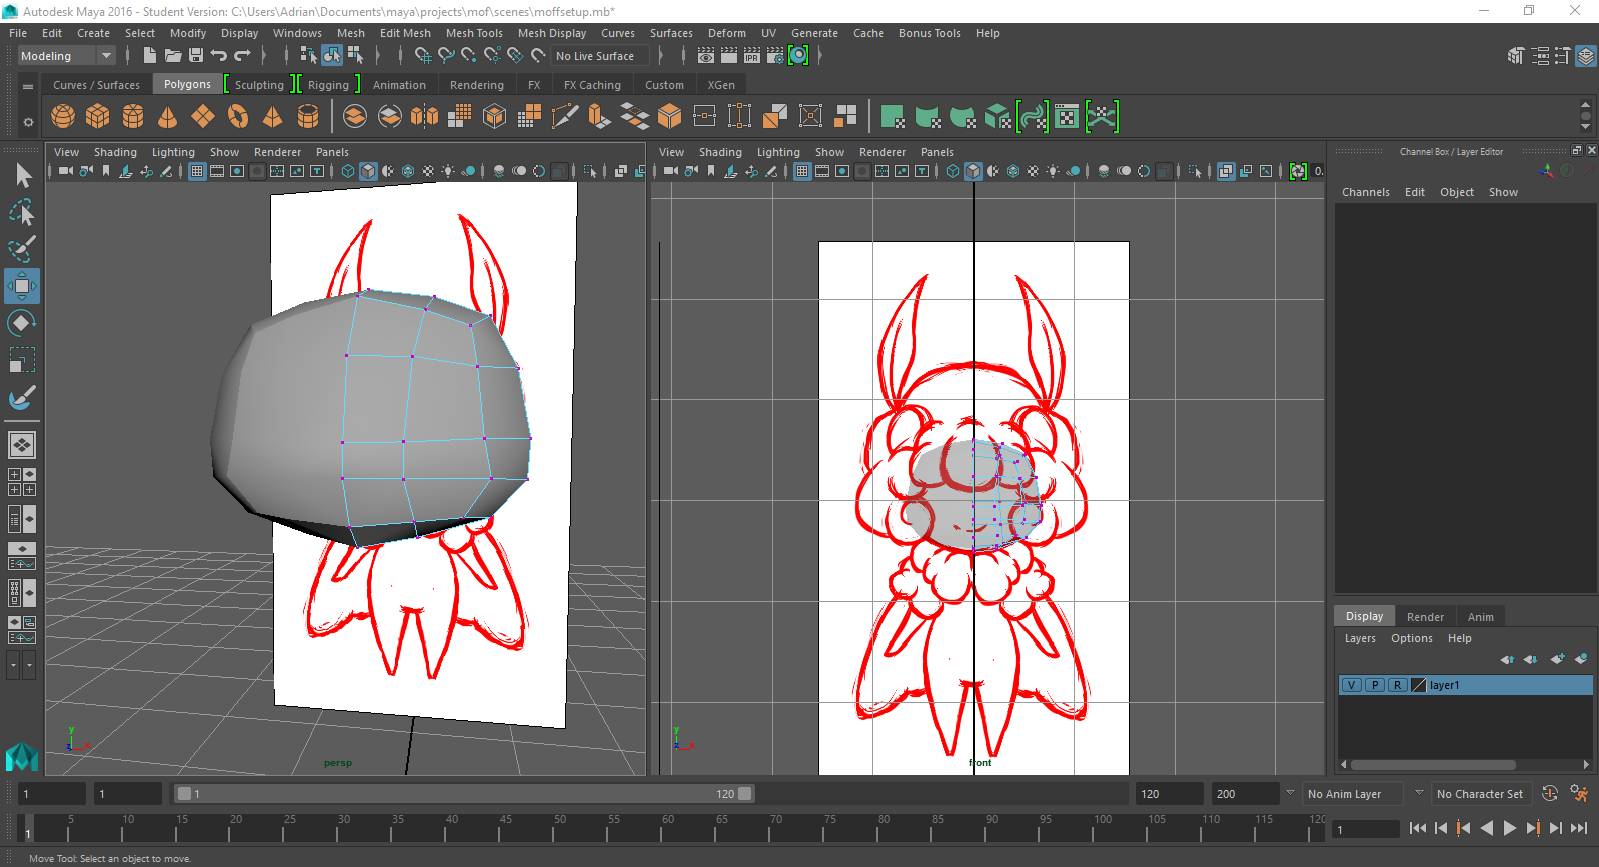
My job within the group now is to build and rig the protagonist model for our game, animate it, and I'm assuming also program in its required behaviors for Unity. I began work on this last week by drawing up a sketching up a turnaround to model the character off:
As of right now I'm not sure how I'll be modelling things like the character's hair and fluffy parts out of single pieces of geometry, but I'm focusing on on its basic body structure for now!
It was very frustrating, but I forgot a lot of what I learned about character modelling last year, and it took me so much longer to get underway than I would have liked. However, I did get started, and so far have a basic head shape to work with. I'll be constructing the body and arms next, and from there figure out how to create the hair and fluff parts.
Tuesday, 11 October 2016
INTERACTIVE :: 12/10/16 - Toon shaders
After our tutorial today, I asked Lena and Regan about toon shaders in unity, and was directed to a downloadable package. From there I used various duplications of the 'ToonShaderLit' material in order to re-create my mushrooms with a more cartoony/comic feel to them.
I quite like these shaders as I was able to use the UVs that I had previously made with them. The shading is based on a simple gradient which I was able to open in photoshop and modify in order to create a harsher gradient. Here are the screenshots I took while I was playing around with them
I quite like the results, though I may need to play around with gradients a bit more and see what happens when I put in things like a colored gradient instead of just plain greyscale.
This evening I plan to redraw my moth character, or at least tweak the drawing i did from the first assignment so that I can spend the next few days trying to build a model in Maya.
Monday, 10 October 2016
INTERACTIVE :: 11/10/16 - Assigning group roles
Today we sorted our roles out for the rest of the project for the semester and it is as follows:
Adrian - Character
Patrick - Level design
Dora - Environments
Joseph - NPCs and Enemies
Knowing what I'm going to be doing now means that I can focus on building, texturing and rigging the character to get it ready for the game environment. The nice thing about it is that it doesn't have eyes, though I feel like it could be an issue modelling the hair and making it animate.
Going to have to pull up what I remember from last year, but at least the overall character will be simpler than my last model.
Monday, 3 October 2016
INTERACTIVE :: 04/10/16 - Animation Demo
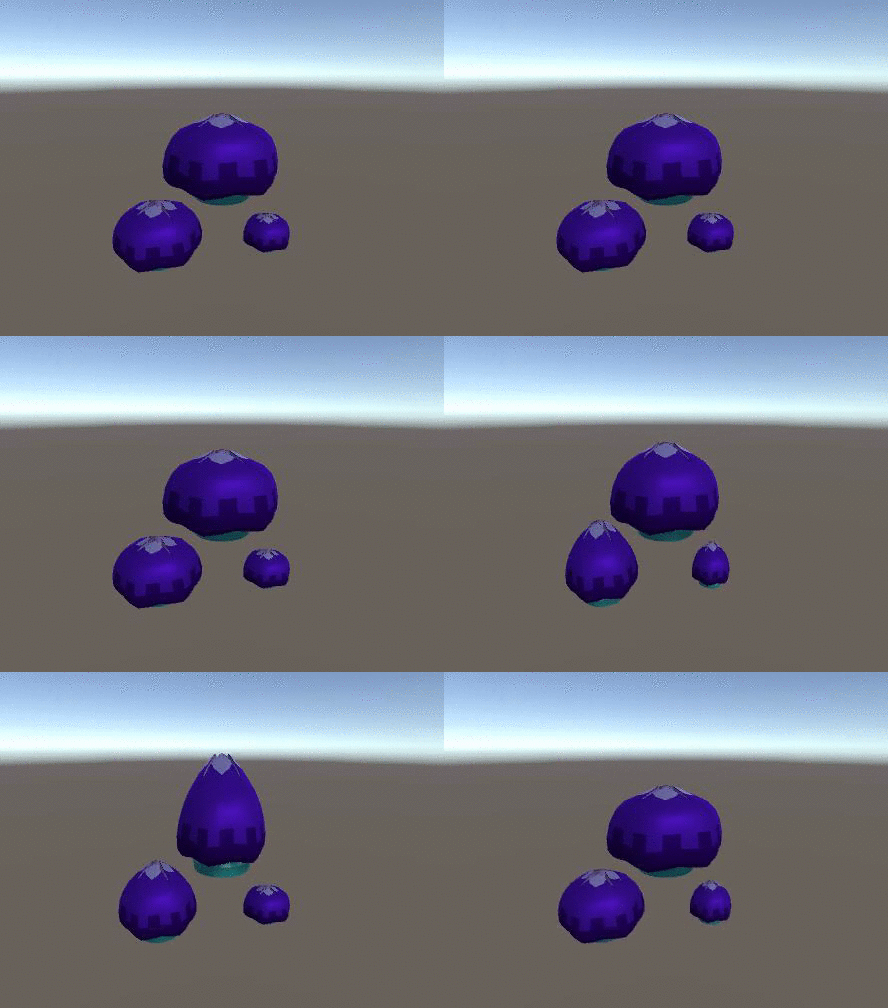
Part of the requirements for our submission is to provide a working animation demo for our presentation! So here are my lil cluster of mushrooms just doing what mushrooms don't normally do in the wild
In the event that this video doesn't work, there is a tumblr version
In the event that this video doesn't work, there is a tumblr version
Monday, 26 September 2016
INTERACTIVE :: 26/09/16 - Mushroom Delay
Spent today working on the cycles of my mushrooms and attempted to find a solution to making my mushrooms delay the way I wanted them to. Searching on google provided a few scripts, but when I attempted to put them into effect, it came up with a lot of errors and was just generally lots of things that I didn't understand.
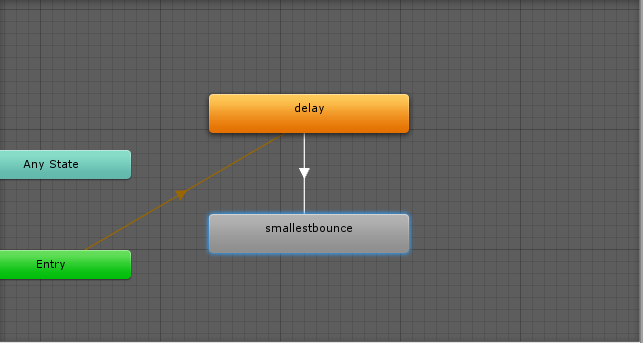
My solution is perhaps not the right way to go about something like this, but I created a 'delay' animation that consists of a single still frame of the animation cycle. By adjusting the speed of this animation, I can make the mushrooms pause for different amounts of time before they begin their cycle again.
Initially I had the delay play once before the mushrooms began their looping animation
but I eventually found that the overall animation of the mushrooms was not as distracting if they had a slight pause after each animation loop, so created transitions going both ways for them.
I understand that a script would be easier and make a lot more sense, but as it stands, the values and how to make them work are so difficult for me to understand. I'm hoping classes next term will shed more light on understanding, and I think what I really need is just an expert to walk me through them and help me understand what each individual part of the script is for and how it makes sense. Even things as simple as a yield value and labeling values left me really confused.
In the meantime though, I'm quite happy with the results and I feel like my mushrooms would be a much less distracting background element now.
My solution is perhaps not the right way to go about something like this, but I created a 'delay' animation that consists of a single still frame of the animation cycle. By adjusting the speed of this animation, I can make the mushrooms pause for different amounts of time before they begin their cycle again.
Initially I had the delay play once before the mushrooms began their looping animation
I understand that a script would be easier and make a lot more sense, but as it stands, the values and how to make them work are so difficult for me to understand. I'm hoping classes next term will shed more light on understanding, and I think what I really need is just an expert to walk me through them and help me understand what each individual part of the script is for and how it makes sense. Even things as simple as a yield value and labeling values left me really confused.
In the meantime though, I'm quite happy with the results and I feel like my mushrooms would be a much less distracting background element now.
Subscribe to:
Comments (Atom)


